Lab Access Cloud Quick Start Guide
- General purpose
- How to connect
- How to connect - MFA for students
- Speedtest
- Clipboard
- File sharing - general information
- File sharing - uploading
- File sharing - downloading
- File sharing - with other users
- Frequently asked questions
- Incident reporting / lab requests
- Tips and tricks
General purpose
This document offers a basic guide how to use Lab Access Cloud connections. It covers access to Labs reserved for NokiaEDU Training. Guide has been arranged in reading order - all terms and common names that are system specific has been explained first, before being used in later paragraphs or sections
Target audience
Every user who is authorized to access the Lab Access Cloud solution.
Applied solution
To access training lab solution called Apache Guacamole has been deployed. Guacamole is a clientless remote desktop gateway, which require no plugin/client software - all you need to access your desktop is a web browser.
Requirements
Because the Guacamole client is an HTML5 web application, use of your computers is not tied to any one device or location. As long as you have access to a recent web browser, you have access to your machines.
How to connect
After successful lab reservation user will receive e-mail confirming booked resources, account validity etc. For course delivery credentials are shared 7 days before delivery. For competence development - 1 day ahead.
Before sharing startpage link it is strongly advised to explain users how to login. Lab is protected against brute force attacks and 5 failed logins blocks user ip for 5 minutes. Explaining the login process can help avoid situation where single user prevents entire classroom from accessing the system.
Students and users without nokia account login using credentials provided to the trainer via email. All students need to have Microsoft Authenticator / Google Authenticator or other 2FA application supporting TOTP.
Trainers/Engineers with nokia accounts login using SSO Login.
Startpage
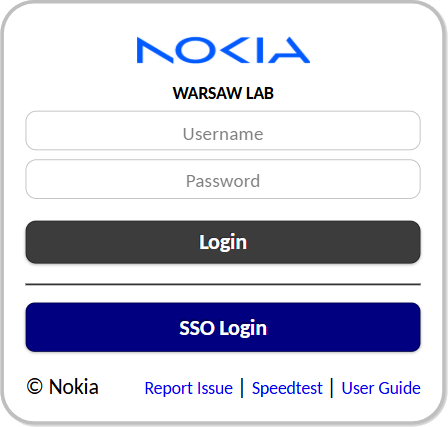
At the main page user can find 3 links at the bottom of the login frame.
Report issue page redirects user to jira page, when one can report issue with booked resources or lab access.
Speedtest allows user to find best access point to lab.
User Guide link to this guide.
Speedtest
Main link provided to user via e-mail is related to booked testline, not user location. There might be a case where better, faster lab access point is available. To find optimal connection user should run a speedtest - before first run and preferably each time traveling long distances
Successful login
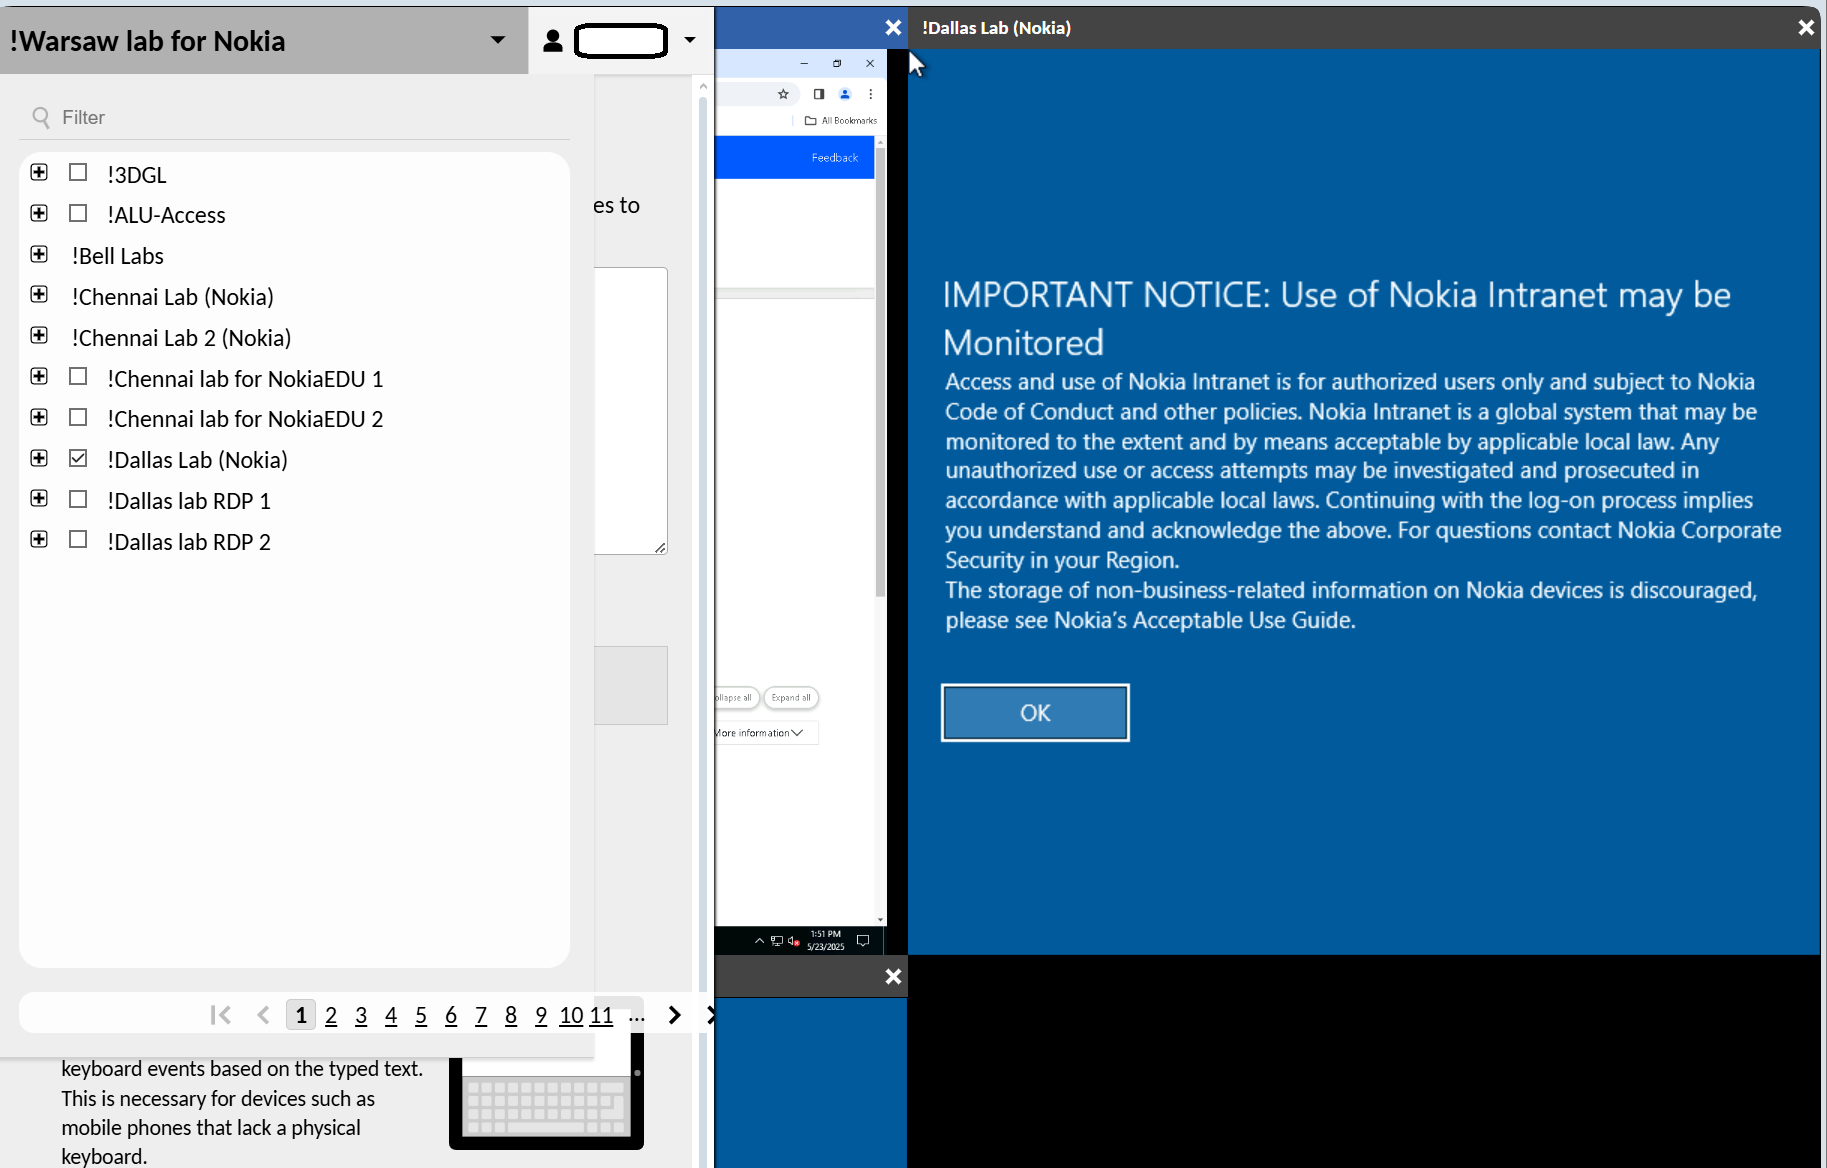
After a successful login, one of two scenarios can occur for the user:
Auto Connection - after clicking login user is automatically connected to dedicated jump server. No further actions required. Scenario occuring mainly for students accounts provided in case of course booking.
User page - after clicking login users can select connection from list of assigned connections from all connections section or from recent connections which contains recently used connections.
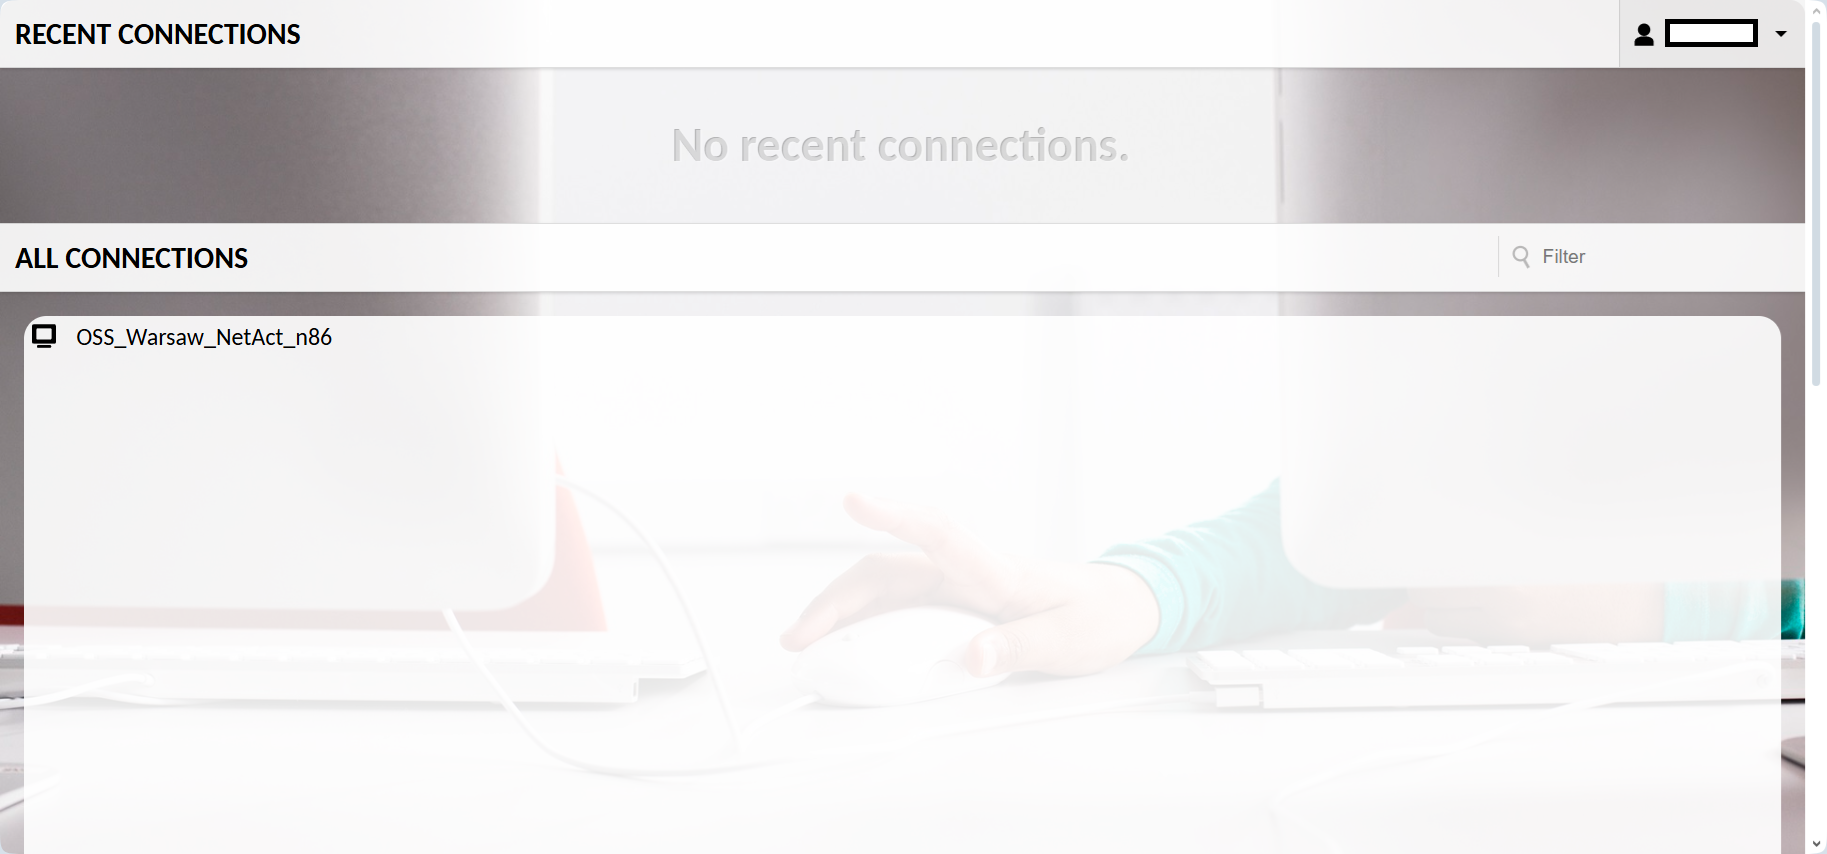
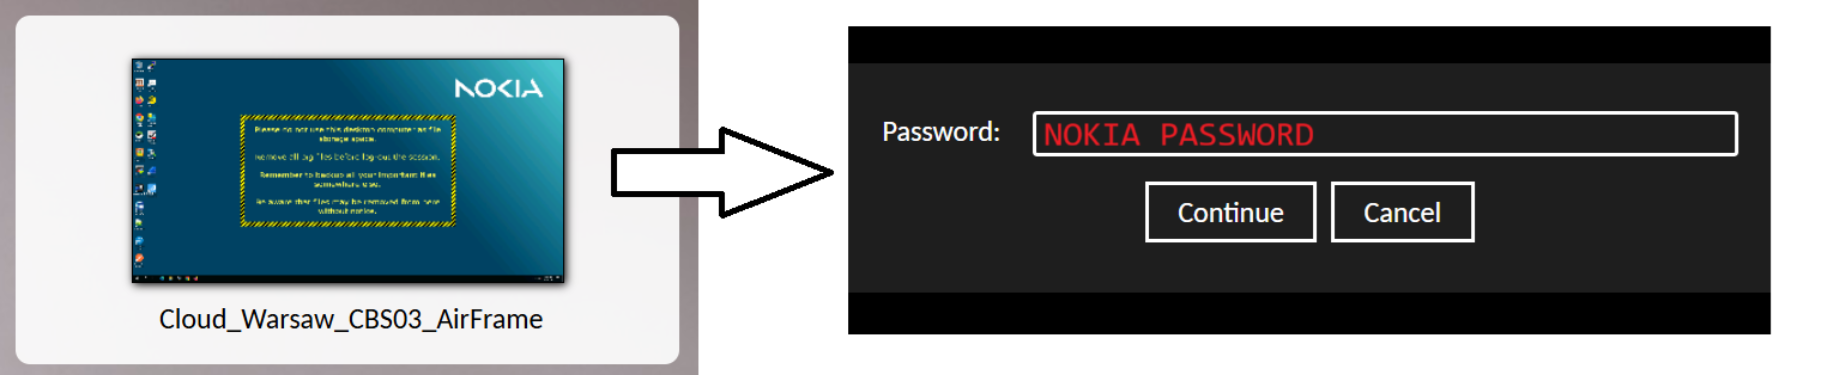
Users authorized with SSO are required to provide their Nokia account password after selection desired connection.
How to connect - MFA for students
Students will have dedicated users for the duration of the course.
These users are now threated as personal and are valid only for the duration of the class. If multiple classes are attended in succession students will have to register each user separately - registrations no longer in use can be safely removed from authenticator apps.
If users is "lost" and requires restoration, for example removed from authenticator before end of delivery, such request can be submited in JIRA.
Please note that MFA step is also protected from brute force attempts. It's important to pay attention while providing codes, mentioned later in this chapter.
Before you start
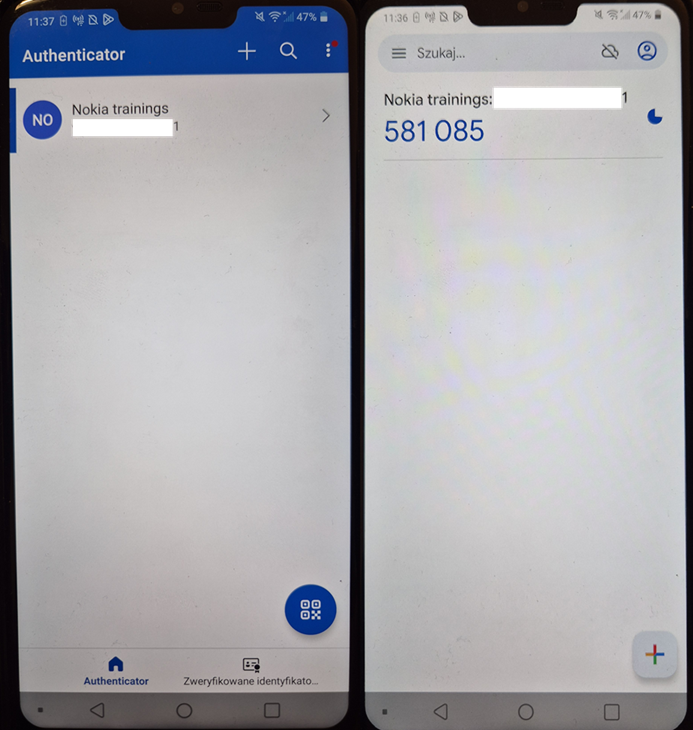
Application supporting 2FA is required to continue. Two most popular - Microsoft Authenticator (left) and Google Authenticator (right) - are used as examples. They can be installed from google store / ios store.
Example screen of what application after scaning qr looks like.
First time login
After entering user credentials and pressing login for the first time students have to register guacamole in the 2FA app by scanning provided qr code and later providing 6 digit code generated by the app.
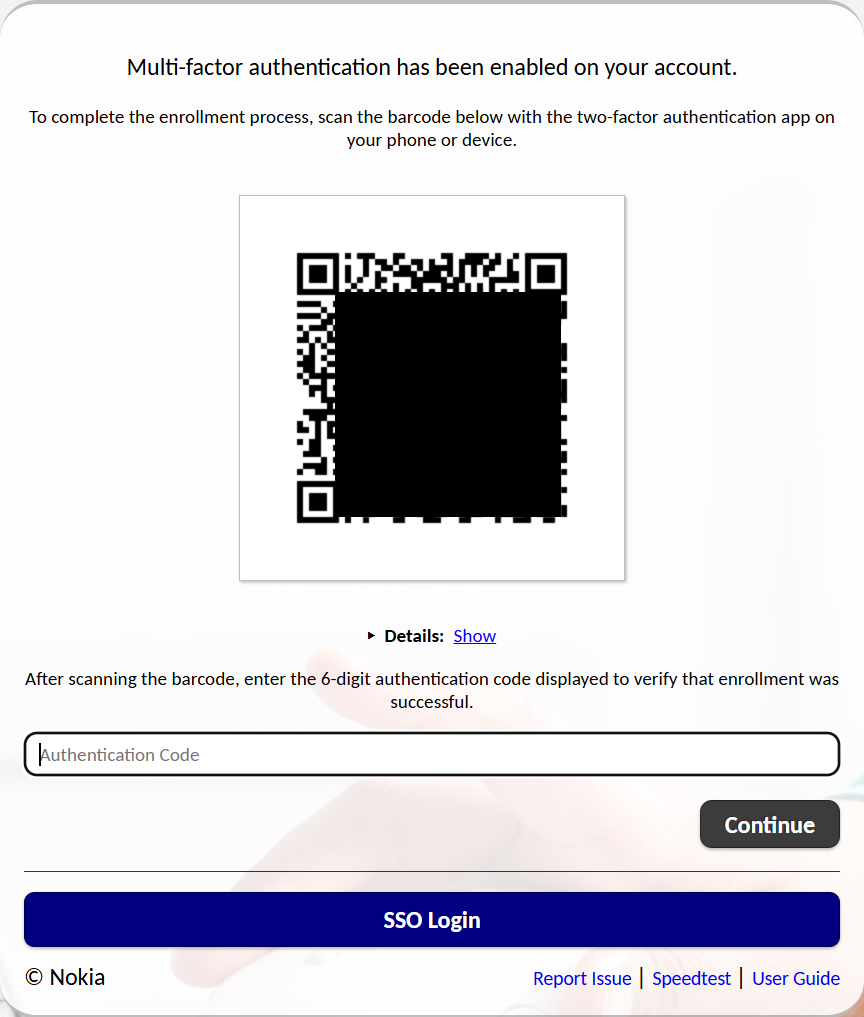
Registration of new guacamole user to mfa application is a fairly simple process. In both examples "add new" button is located in lower right corner of the start page. Microsoft authentication provides default "scan qr" button to immediately start camera and scanner, while Google authenticator requires selecting qr scanning from the list.
Both application will automatically add new entry after successfuly scanning qr code.

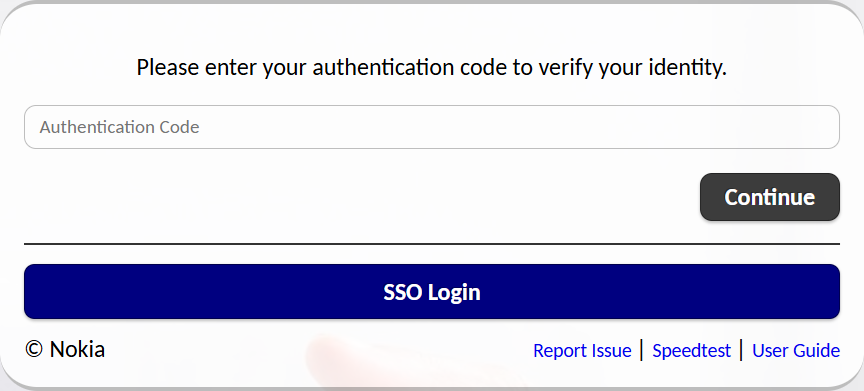
Subsequent logins
User only has to register once for his username. The subsequent logins require user/pass and 6 digit code from 2FA app.
There is no need to rush entering the code - codes regenerate every 30 secounds, so if there is only few seconds left you can safely wait for the next one.
Disclaimer - single code is valid only for a single entry - if user logs in, logs out and want to login again with the same code he'll fail.
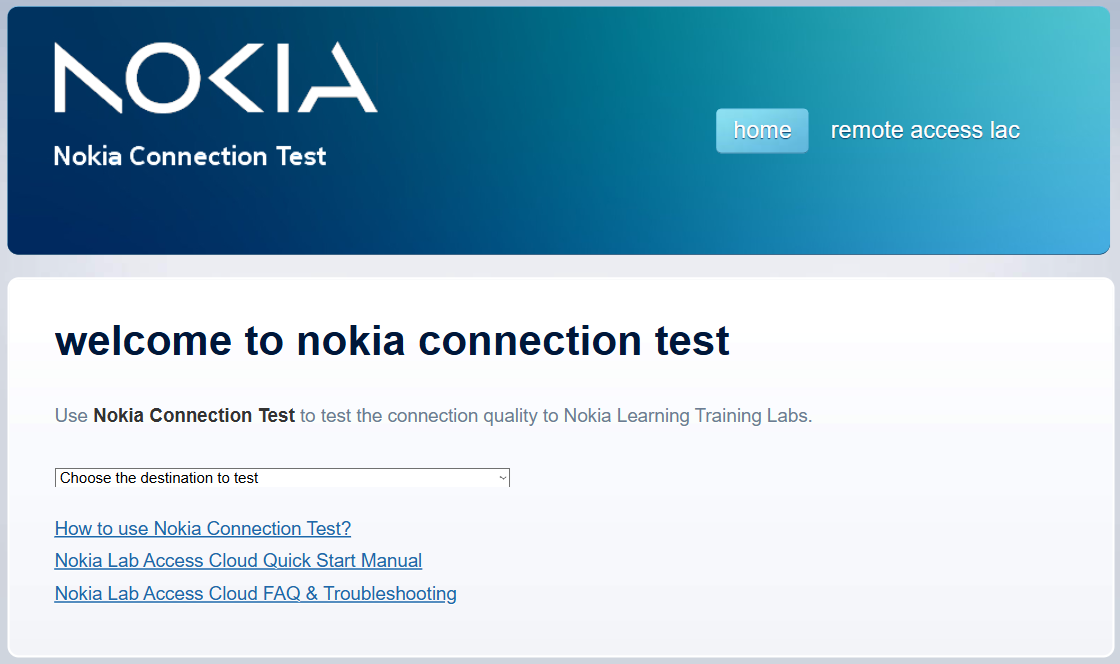
Speedtest
On speedtest page user should select reserved lab from dropdown list and follow to the accesspoint with lowest latency.
Speedtest results
Below example result of speedtest with destination Warsaw Lab
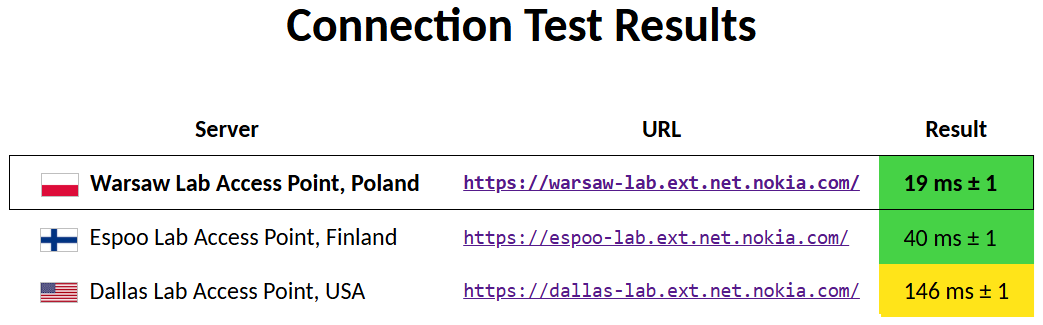
In the results one can find access point location, link and color coded test result. Results are ordered with the best at the top row
Color coding explained
| Green | No problems related to connectivity. |
| Yellow | No problems related to connectivity. A little more latency but it should not have a noticeable effect. |
| Orange | The connection is good, but it may sometimes feel a little sluggish. |
| Red | You are likely to experience moderate to severe connectivity problems including occasional timeouts and disconnects. User experience will not be optimal; proceed at your own risk. |
| Black | No or very poor connectivity. Even if you have connectivity you will definitively experience problems including frequent timeouts and disconnects. Do not proceed. |
Clipboard
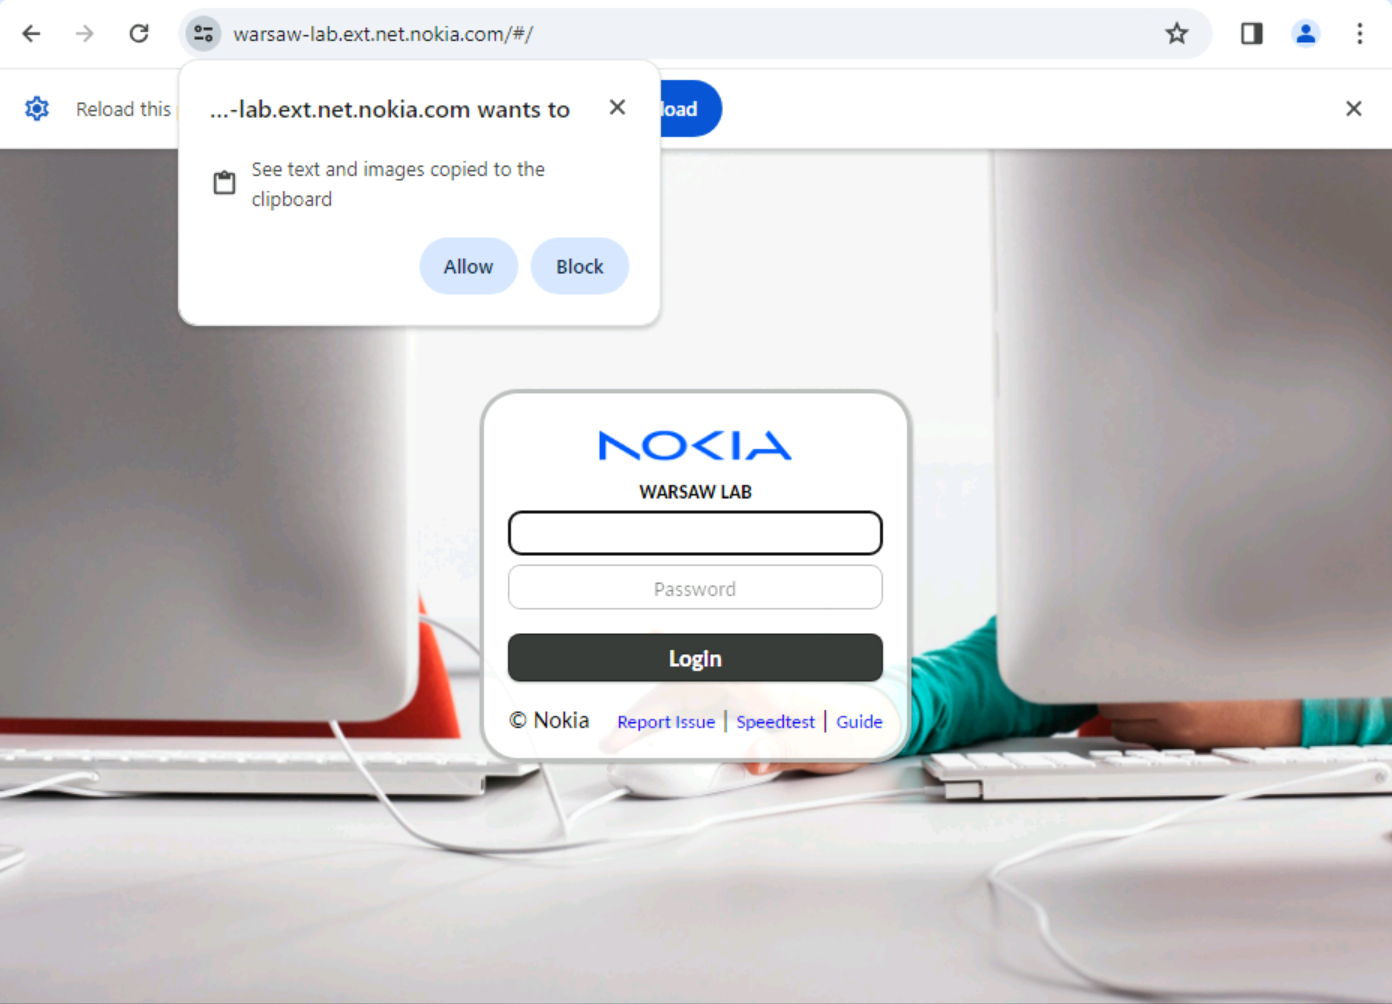
When first opening guacamole startpage user has to allow application to use clipboard. Allow should be selected.
Copying text
There are two options to copy text between host machine and remote server.
Background copy is the most basic solution. We threat guacamole just like every other window in a native system and simply copy-paste between windows. We do not see the text that's contained in the clipboard
Assisted copy is an option utilizing additional guacamole feature. With this option user can see what he copies and adjust the text in between if he wishes to.
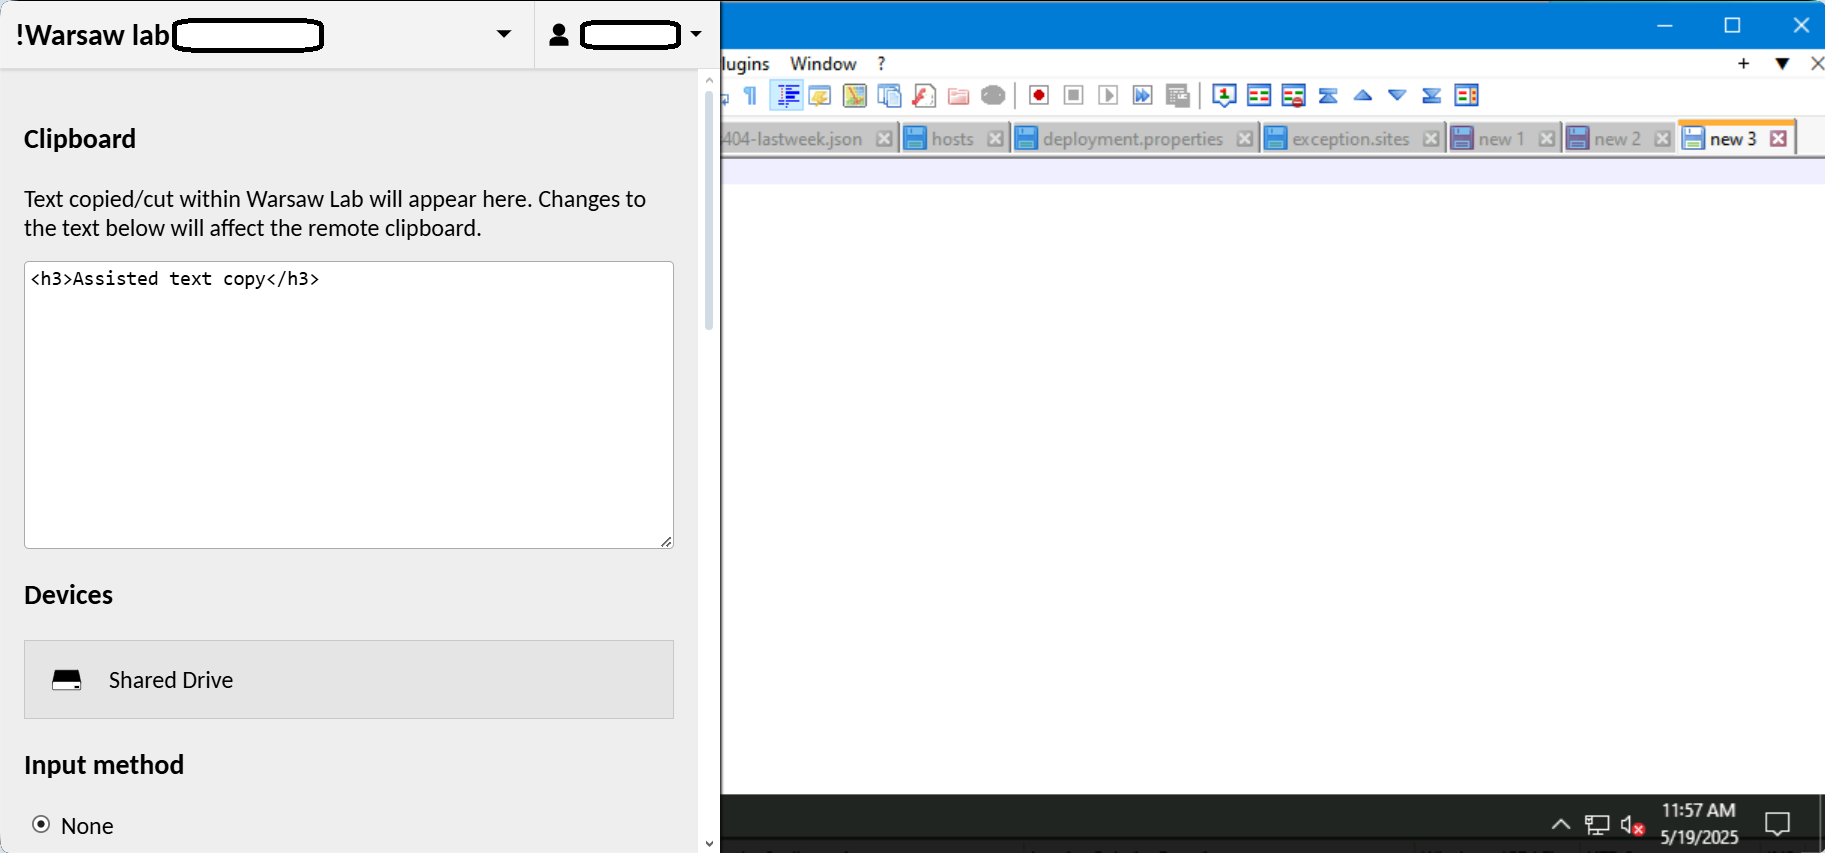
Assisted text copy
Once user is connected to any connection the system allows opening/closing additional menu by pressing ctrl-shift-alt(left). When open current clipboard content will be automatical displayed. From here user can directly modify copied text - remove tabs, correct typos etc.
File sharing - general information
Unless specified otherwise machines available via guacamole are not met to permanently store files. Each user has hard quota of 5GB on storage that will prevent them from hoarding no longer necessary files.
Nevertheless guacamole offers two possibilities to store files for longer periods of time or/and share them with others.
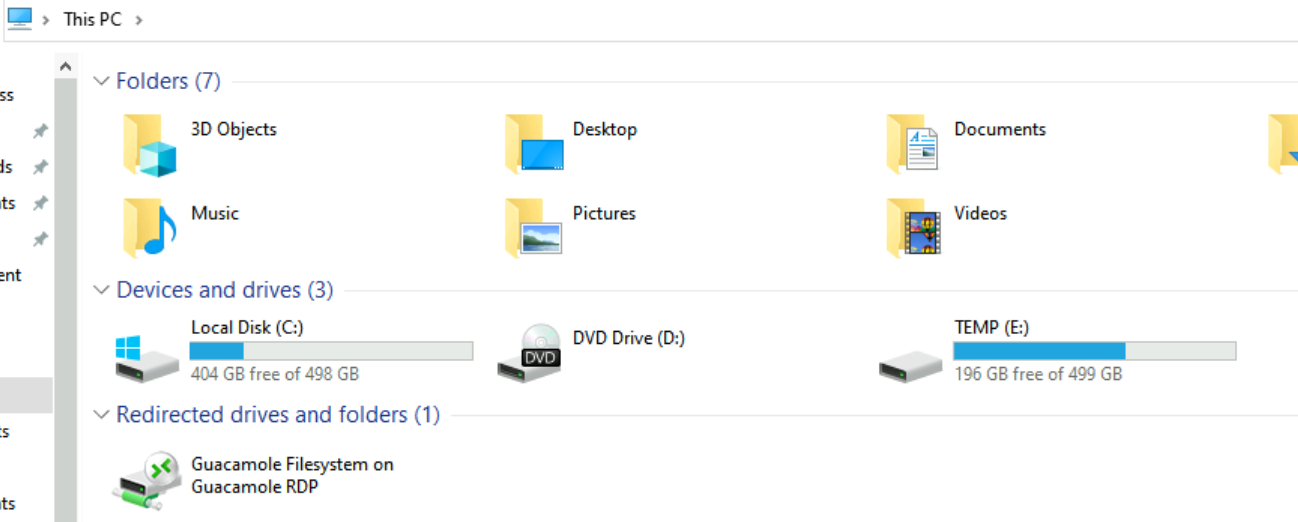
Guacamole Filesystem on Guacamole RDP commonly called Guacamole G drive is a nfs drive connected to specific access point - connecting via Warsaw access point attaches nfs in Warsaw, connecting through Espoo attaches nfs in Espoo etc. Files located here are not executable as this storage is meant to be used for upload/download/sharing files only. See detailed sections.
(TEMP)E: drive is a disk attached to vm and it access point unrelated. It doesn't matter which access point is used it will be the same storage. It's purpose is mostly to store larger file such as deployment files or iso files that will be used during trainings.
File sharing - uploading
All uploaded files land on G drive mentioned in previous section. There are two ways to upload files - not assisted and assisted. In case folder is already opened it requires refreshing after upload.
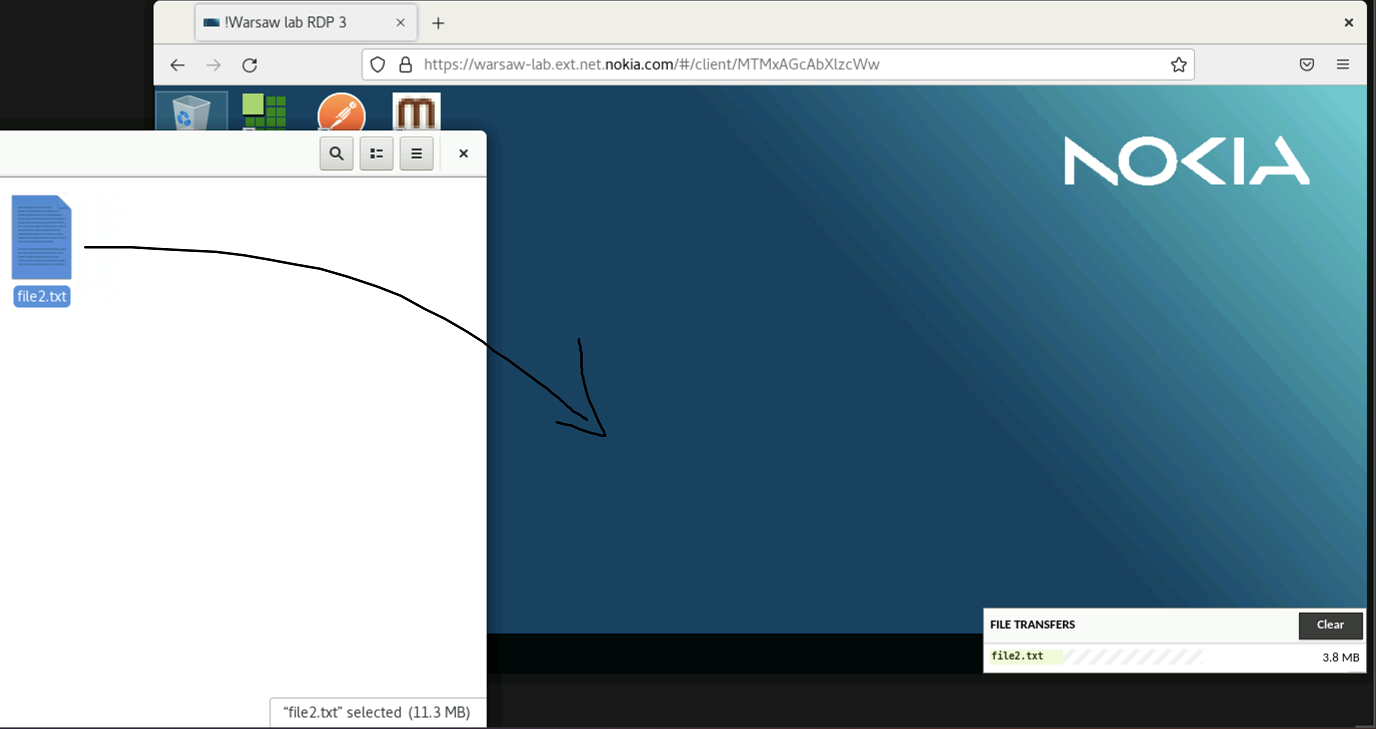
Not assisted file upload is basically drag and drop option. Just like with text ctrl-c / ctrl-v user can simply drag file from his own folder onto desktop in guacamole and file will be uploaded to G drive.
Assisted file upload utilizes guacamole menu that can be opened with ctrl-shift-alt(left) key combination.
Here user should press Shared drive and later Upload Files to browse through the resources on local machine.

File sharing - downloading
While user can download files in multiple ways the focus of this section would be downloading files created within lab, such as network element configurations, log files from elements, files shared with students etc. Sharing part will be covered in the next section
Download folder is located on G drive. To download file user can drag and drop file onto the folder or open the folder and drop file inside. This will start download process - depends on browser setup automatically save to default location or ask for confirmation.
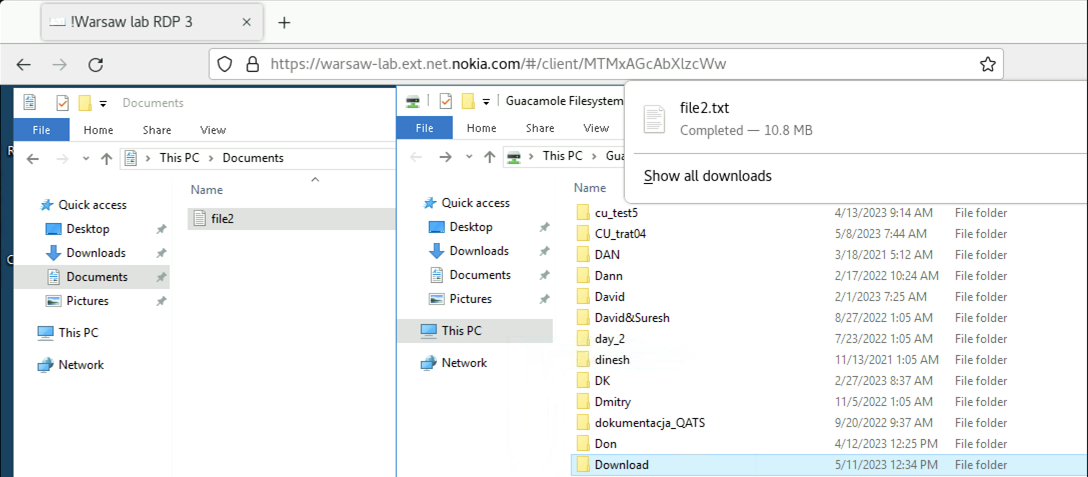
Please note, that file does not stay in Download folder.
File sharing - with other users
There are multiple ways to share files between users of lab using guacamole.
Sharing files with students
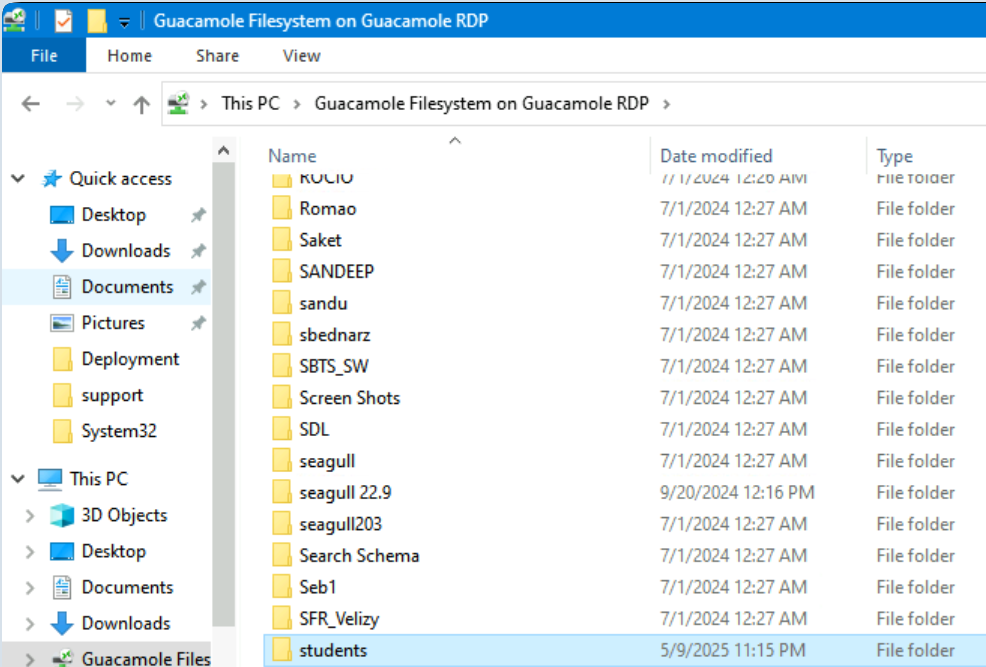
The biggest user group are students. Using G drive trainers can easily share files necessary for practical exercises. Inside G drive there is folder students which is mounted as G drive for student accounts.
Important note - both trainer and users should use the same access point to connect to lab in order to make this option work. See general information about file sharing.
Sharing files with other lab users
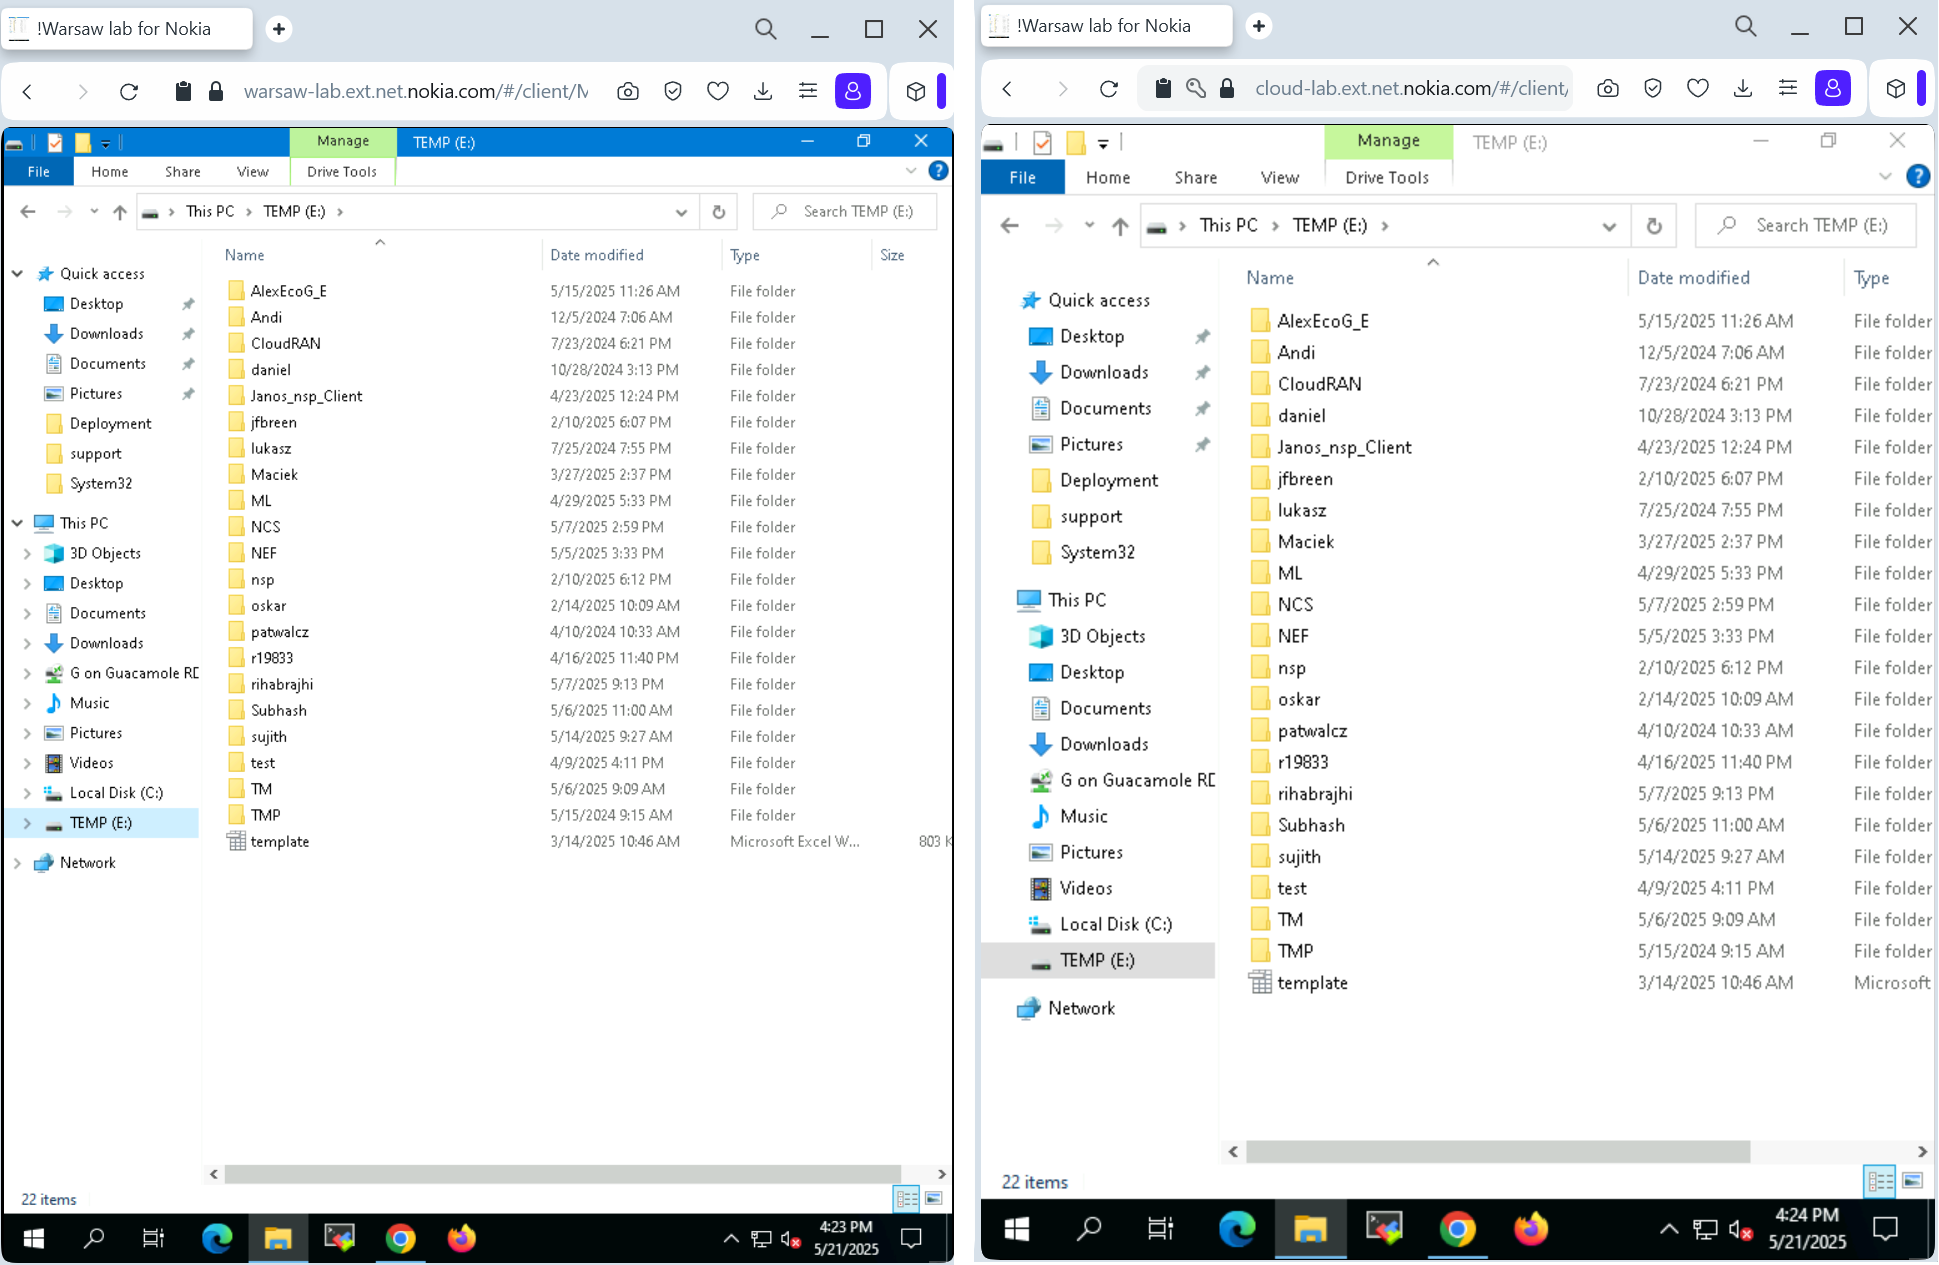
Machines that users access, unless stated otherwise, are shared between users. That means that there are certain areas where all users can access, specifically G drive and (TEMP)E: if present.
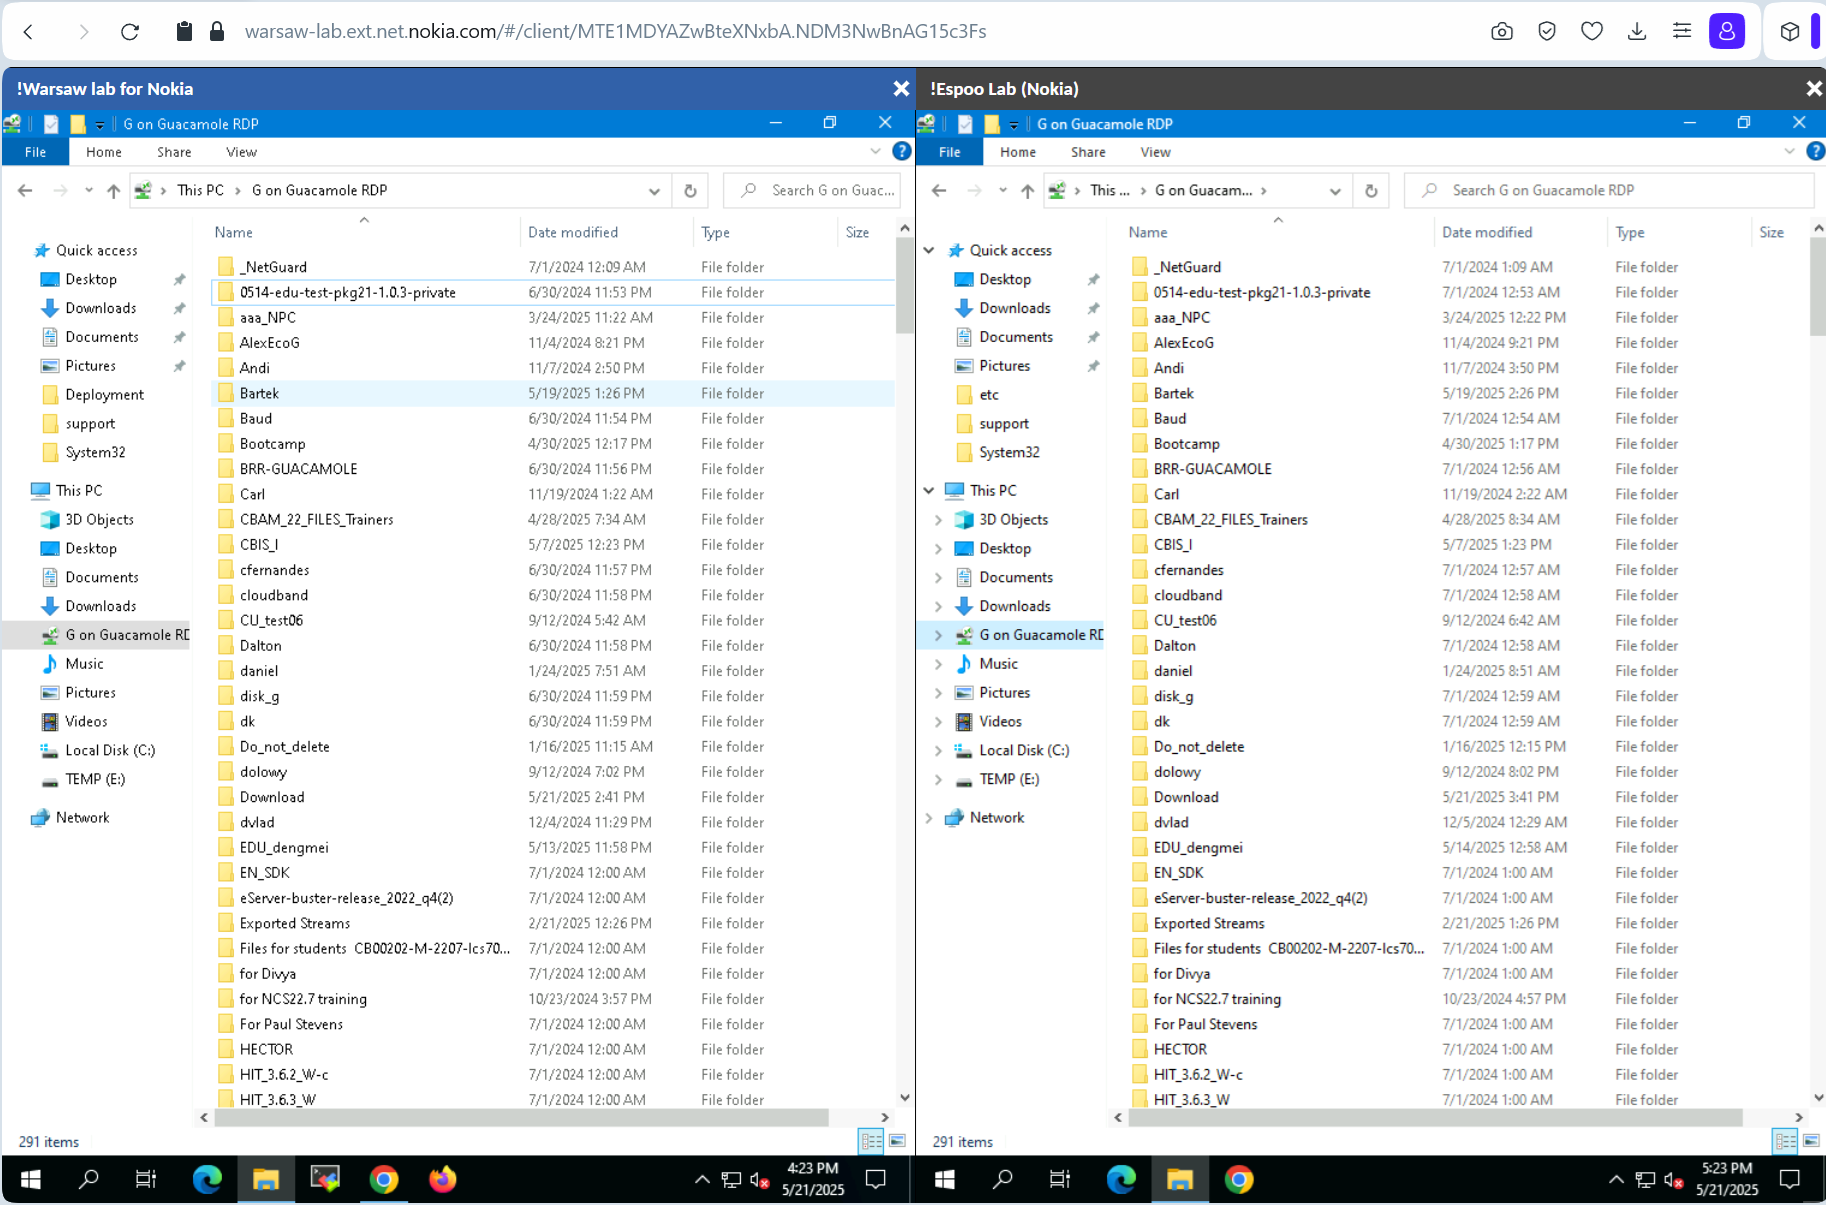
To share files with other users using G drive it is necessary to be connected using the same access point. Example - two users connected using Warsaw access point, one accessing Warsaw lab and other accessing Espoo lab will both have access to the same G drive.
To share files with other users using E drive it is necessary to be connected to the same jump server. Example - two users connected to the same jump server (like plwalab01) one connected using Warsaw access point, one connected using Espoo access point.
Frequently asked questions
Minimum hardware requirements
Hardware should support recent / up to date web browser that supports HTML5. Due to the architecture of the platform all calculations are happening on server side - applications opened on remote desktop do not consume local host resources. As long as local host can support smooth internet browsing hardware is good enough.
Minimum required connection speed
It is recommended that user has at least 0.2Mpbs download speed, 0.1Mbps upload and latency below 500ms. Stability of network is also very important factor. It's advised to run the speedtest to check for the best connection option.
Session disconnects
Most common setup for disconnects in lab is 8h inactivity on windowses and up to 1.5h in linux system. Apart from weekly reboots happening at night (CEST/CET) during weekends all connections are permanently online. If user session seem to reconnect randomly and/or often it's suggested to test alternative network provider if possible (home network/office network/mobile network thetering) or checking alternative access point (Speedtest).
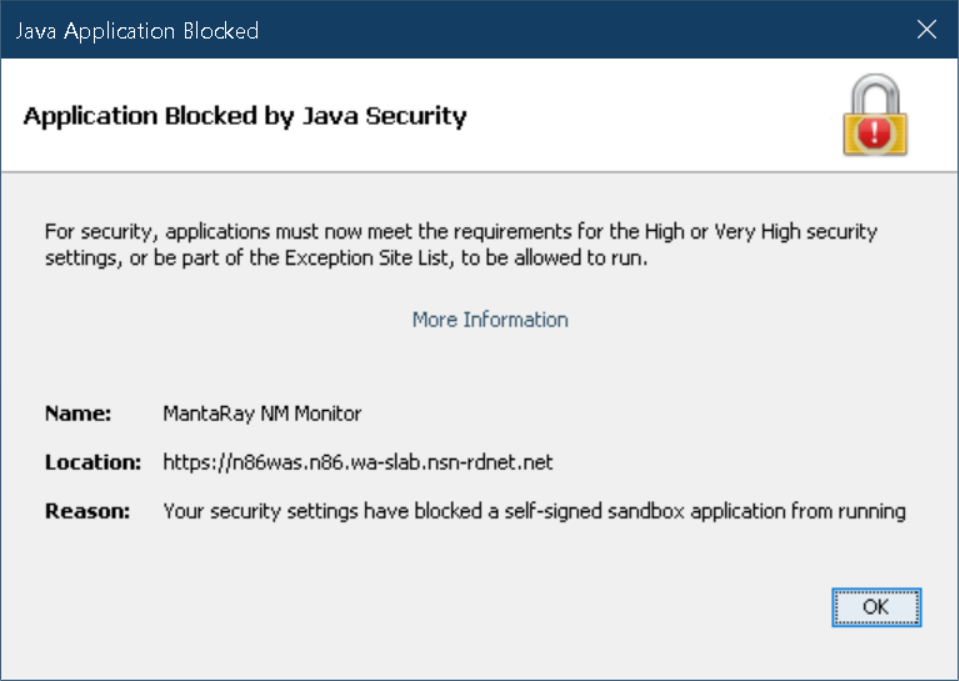
Java exception
While all already used platforms have been added to java exception sites there are cases where users are first users of the platform through guacamole connection. In such cases it is necessary to create JIRA ticket and report the issue. Editing allowed sites via java configuration application will not work - global configuration is in place in order to ensure that all users have all the exceptions added.
Incident reporting / lab requests
All incidents and reports should be submitted in JIRA - current link is available in lab access confirmation email and guacamole login page. Note that usually better explanation of the requests speeds up the execution.
Some of the useful information that should be provided in a ticket can be found below.
Reservation ID every network element has been verified by lab team before release for users - with this ID engineers can verify that users are using equipment they reserved.
Username - guacamole login. Helps to identify if it is an issue of a single users or if it is a global issue.
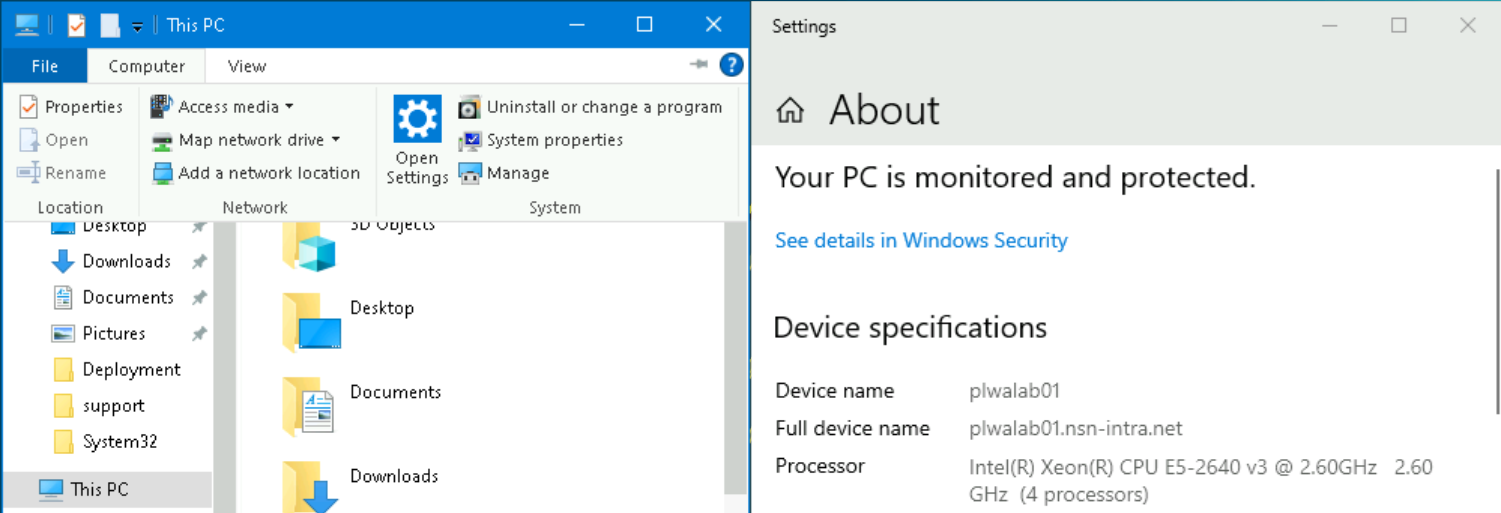
Jump server name helps to narrow down the root cause of the issue. Information is provided in system properties of a system.
Connection name - name of the connection selected by user in guacamole gui. Available for users with 2+ connections assigned.
Access point - link to guacamole access point.
Issue description is one of the most important parts of incident/request. Vague message like
MantaRay n86 is not working with my exercises please help!
is almost never enough. Be precise, provide description, steps required to recreate the actions that do not work, logs and screenshots - all details matter.
Tips and tricks
Multi connection - separate tabs
Users can connect to multiple connections ie. in order to give demonstration in two separate labs. There is no need to disconnect from one connection in order to connect to second one.

Multi connection - same window
In comparison to switching between tabs this option provide multiple connection within the same window. To display multiple connections in the single window user should open guacamole menu with ctrl-shift-alt(left) combination, click on connecion name and select additional connections.
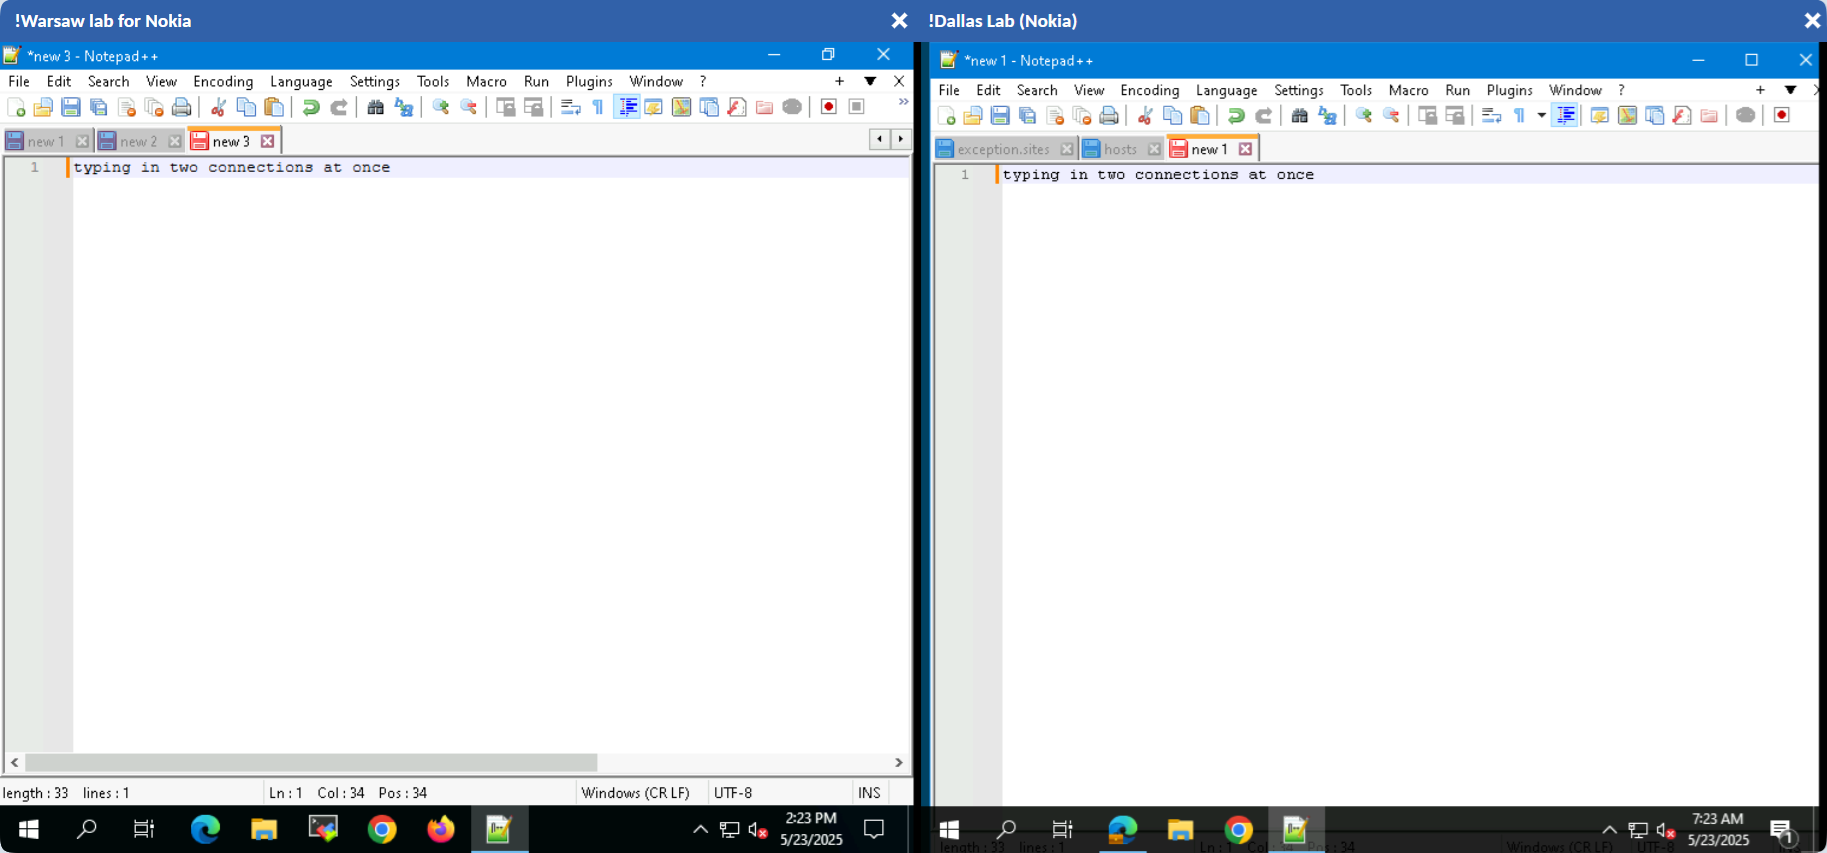
Parallel edit
When displaying multiple connection in one window there is a possibility to provide input to multiple connections at once. To provide text input in multiple windows in parallel user has to press shift and select target connections. Active connection title are highlighted.